Winter RV Living: How To Stay Warm!
Candice Dice • October 29, 2025
Winter RV living in cold climates! Is that even a thing? Don't all RV owners simply go south for the winter?
Unfortunately, not as many as you might think, as many RV owners don't have a choice where they spend the winter due to work or family situations. As much as we tried to avoid the cold weather as full-time RVers in the early years, it simply didn’t work out for us, and we suffered through some deep freezes, snow, and ice in our RV.
Preparing to spend the winter in your RV in a cold climate is quite different than winterizing an RV, but most of the videos on YouTube are focused on winterizing, which is what you need to do before you park it and forget about it for the next 6 months. Like us in the early years, though, there are a lot of you planning to tough it out and actually live in your RV through these cold winter months, with many of you doing it for the very first time.
In this post, we’re going to show you all of the basic stuff we do to get ready for those cold and nasty winter days and nights. Preparing for winter RV living isn’t as hard as you might think, but there are some basic things you need to do and understand before those temps start to drop, so stick with us here…you won’t regret it.
If you won't be living in your RV, check out our guide to Winterizing your RV
If you are hoping to migrate South for the winter, check out our Southern Migration Planning Guide.
Also tune into our RV Winterization Podcast for even more information!

The Amazon links on this page are affiliate links, which means we will earn a small commission if you choose to make a purchase using our link. This commission comes at no additional cost to you.
Protecting Your RV Systems
The first thing we should talk about here is that it’s not just about keeping YOU warm this winter, it’s also about protecting your RIG. The last thing you need is a busted water line, or worse yet…one of your holding tanks…because that will be both disgusting AND expensive to fix.
You can always put on more clothes or turn up the heat to keep yourself warm, but if left unprotected, your plumbing and septic systems WILL fail, leaving you in full panic mode as you work to get them fixed quickly.
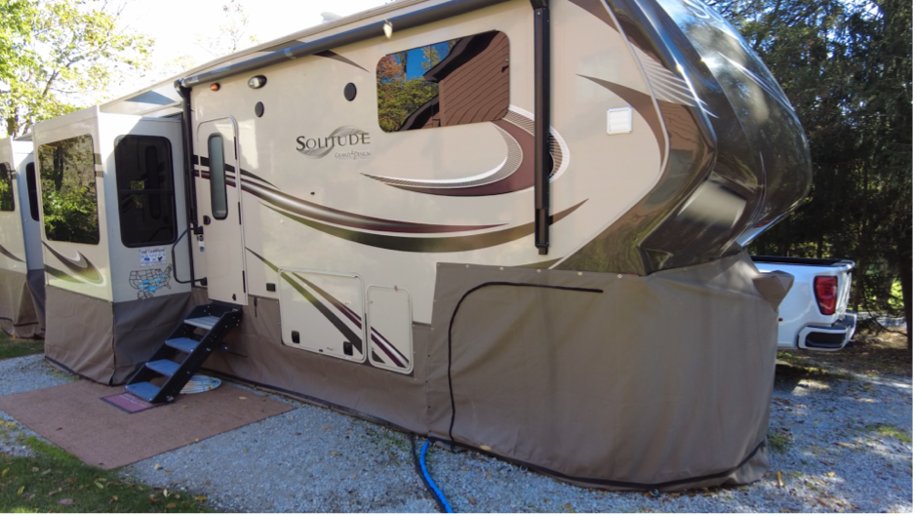
Skirting your RV should be at the very top of your list and will quite possibly be where you’ll get the most bang for your buck! This is the number one tip because following the rest of the tips below will be a constant uphill battle without a skirt.
The ducting that comes from your furnace not only provides heat to the inside of your rig, but also provides some radiant heat to the underbelly, which is where all of your tanks and much of your plumbing is located. You need to retain as much of that heat as possible, and skirting will have a huge impact on your ability to do so by keeping that frigid winter wind from whisking the heat right out from under your rig.
Note: Even if you have free electric and don't want to run your propane furnace, you should at least keep it around 45 degrees minimum (when outside temps drop below freezing) to protect your tanks and plumbing.
There are several options for skirting depending on how much money you want to spend, with the cheapest being the DIY option. You can easily make your own skirting from foam boards, heavy-duty canvas, or sheets of vinyl. DIY options are nearly endless, and you can be as creative as you want.
Alternatively, you can buy either an “off-the-shelf” skirt from companies like EZ Snap or AirSkirt, or have a custom-made skirt precisely measured and fitted for your specific rig (the most expensive option).
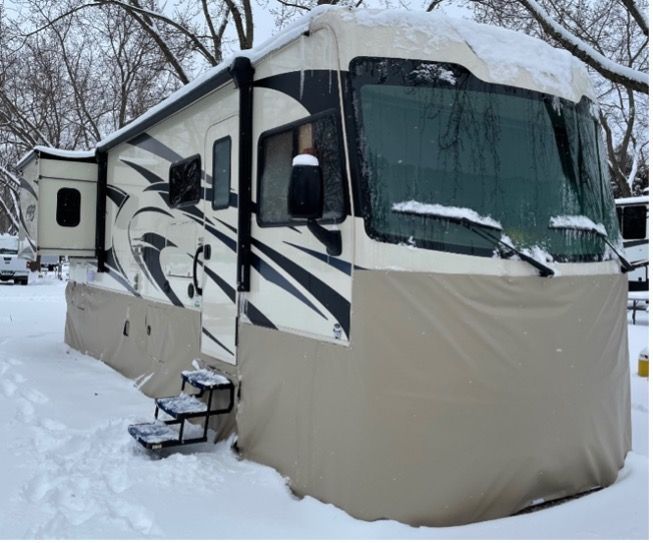
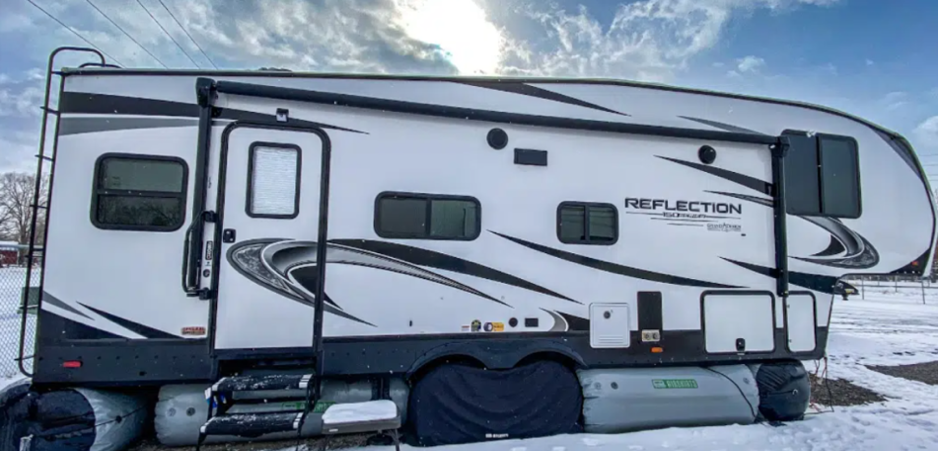
We won’t dive deep into any of these options because you can do a simple Google search for RV skirting options, and you’ll get plenty of hits. The real point here is that a skirt is absolutely a must-have item if you’re planning to winter somewhere that consistently gets below freezing weather. The skirt will not only help keep your underbelly warm, but it will also help retain heat inside your rig, which means you’ll spend less time and money getting those propane tanks filled.
Before you decide which skirt to use, though, check with your campground to verify their rules on skirting.

Heat Lamps
Below Freezing: Remember, it doesn’t need to be a sauna under there, you just need to keep your hoses, water filters, water softeners…anything with water in it…from freezing. Unless you’re sitting in below zero temps for days on end, it really doesn’t take much to do that, so the addition of one or two heat lamps will likely still be necessary on those extremely cold days, but there’s no need to go overboard.
Note: Use caution when placing them and keep them well away from anything flammable.
Freshwater Hose
Next, let’s talk about protecting your freshwater hose. You have two simple options here: prevent the hose from freezing or COMPLETELY drain the hose every time the temps are expected to drop below freezing.
The easiest solution is to buy a heated hose. Now, these things aren’t so powerful that they’ll actually provide hot water, but they will keep the water inside the hose from freezing. They’re also not cheap, but they will provide peace of mind, which is well worth the money. The blue Camco heated water hose is effective down to -20F and is an excellent option. We used ours for three winters and never had a single issue. The hose is thermostatically controlled, so you can leave it plugged in all the time, and it will cycle on and off as necessary.

If you don’t want to get a heated freshwater hose, then the only real alternative is to use your onboard freshwater tanks when temps fall below freezing, which means filling them every couple of days and draining the hose completely when you’re done.
This isn’t a terrible option, but it comes down to how much effort you want to expend. Just keep in mind that your freshwater tank may not be heated so check your owner's manual to be sure. However, if you have a skirt and keep the tank relatively full, you shouldn’t have issues with freezing.

Water Filters & Softeners
If you have an external water filter or softener, you’ll need to keep those from freezing as well. The easiest solution here is to put them inside your pass-through. If you don’t have the room, you’ll likely need at least one heat lamp pointed at them to keep them from freezing.
Septic System
Next is the septic system, and there are a couple of things you need to be concerned about here: the septic tanks (black and grey) and the septic hoses outside. Let’s talk about the tanks first.
Septic Tanks
Many RVs come with tank heaters for both the grey and black tanks. If you have these, make sure you turn them on well before freezing temps creep in. Like heated hoses, tank heaters are not super powerful, so if you don’t get them turned on in advance, it may be too late. Whenever outside temps are predicted to fall below freezing, we turn ours on and set them at about 45F. This just helps to jumpstart the process. If your RV didn’t come with tank heaters, you might want to consider installing them yourself. This could be a little difficult because you’ll likely need to remove part of your underbelly to attach them to the tanks and make the electrical connections.

The least favorable option for the septic tanks is to completely drain them before temps fall below freezing and then simply not use them until it warms up again.
Septic Hoses
For the septic hoses, our recommendation is to make sure they’re completely drained after each use in freezing temps. You can keep them connected, but you need to ensure there’s no water in them after you dump your tanks. This means fully walking down the line to ensure all water drains out.
Another alternative is to install heat tape on the septic hoses. For us, the risk of the heat tape failing is too great, and we didn’t want to chance having a busted septic line and then having to deal with the cleanup.
Propane Tanks
Propane tanks may also need a little extra love to ensure proper operation. The propane in your tanks will be good down to about -44°F, when the propane gas will start to convert to liquid form. For most people, -44°F isn’t a concern.
However, as temperatures approach single-digits and below, the tank pressure will start to drop low enough that it may cause problems for your propane appliances, especially your furnace. If propane pressure gets too low, those appliances can be starved of fuel and may not operate properly.
The two best ways to combat this issue are to keep your propane tanks as full as possible and keep them warm. Now, you probably don’t need to get them filled every day, but you’ll definitely want to get them filled a little sooner than you would otherwise. Generally, the more liquid volume in the tank, the higher the pressure will be.

Keeping the tanks warm will help keep that pressure up as well. One option is to place your tanks somewhere they can be warmed by heat lamps. You may need to install longer hoses to do this. Just be aware that the National Fire Protection Association has code requirements you need to meet if you do this. We following video shows how we did this, so we won’t get into the details here.
Another option to keep your propane tanks warm is to use a heated propane blanket. However, these are not cheap, running at least $200 for a good one. This is a good option, however, if you have consistent or prolonged single-digit or below zero temps.
Inside the RV
Let’s shift gears now and talk about the inside of your RV. For the most part now, we’re just talking about how to stay comfortably warm in the winter, and there are several things you can do.
Bundle Up!
This is kind of a no-brainer, but you can simply wear more clothing. Many people don’t like to do this, but wearing more clothing allows you to lower your thermostat, which will save you a ton of money. The lower you set your thermostat, the less propane you use, which equals more money in your pocket. One of the biggest pieces of advice here is to wear slippers. Not only is it scientifically proven that wearing slippers can help avoid colds and the flu, but it also helps keep the entire body warm.
Beyond more clothing, there are several things you can do to keep warm:
Fireplaces & Space Heaters
If you have one, use your fireplace as an additional (not primary) heat source. This is an especially good idea if your electricity usage isn’t metered. Alternatively, you can use space heaters in combination with a fireplace.

A few points of caution here:
- NEVER leave your fireplace or space heaters unattended and make sure they can’t be accessed by small children or knocked over by pets. Starting an actual fire in your rig is NOT the best option to stay warm!
- NEVER plug your space heater into a power strip. Power strips can be easily overloaded and can become fire hazards.
- NEVER coil up the space heater power cord. It’s tempting to do this to get it out of the way, but a coiled-up power cord can become very hot, and again, a fire hazard.
- ALWAYS make sure your space heater has a safety switch on the bottom that shuts the heater off if it gets tipped over.
Rugs will not only keep your feet off the cold floor, but they also help insulate the floor, keeping more heat inside your rig. These are especially nice in the bedroom if you don’t have carpet. Area rugs are relatively cheap, so you get a lot of bang for your buck on this one.

Roof Vent Pillows
If possible, put something in your roof vents inside your rig. If you don’t have any small couch pillows lying around, you can purchase vent pillows pre-made for your vents on Amazon for about $15. A lot of heat escapes through those vents, and additionally, those vents let in a lot of heat in the summer, even when they’re closed, so you can use these pillows year-round.

Window Insulation
Windows, windows, windows. The best option here is to install dual-pane windows, but that’s super expensive, especially after-market. Short of that, Reflectix insulation, or another similar window insulating material, is an absolute must for the inside of your rig and will help with two different issues.
First, it helps retain heat in the rig by insulating the windows. Second, it reduces the amount of condensation that forms on the windows, which can become menacing and potentially harmful to your rig. Rolls of insulation material can be purchased on Amazon or many hardware stores and then cut down to fit your windows. The window insulation can be removed on sunny days to let the sunlight provide some heat.
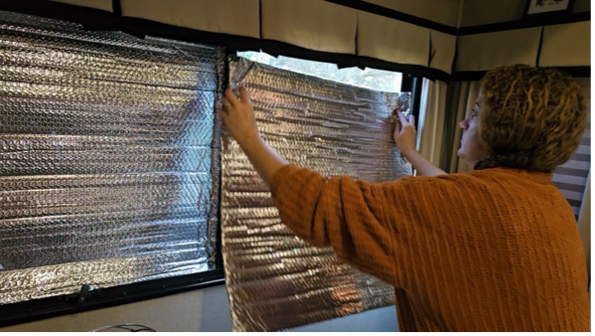
Note: We highly recommend labeling your Reflectix after you get it cut down to size so you won’t have to play the guessing game (like we did) when you go to put them back up the following year. We also use Reflectix in some of our windows during the heat of summer to block the sun’s rays from turning our RV into a sweat lodge.
Another option that many people swear by is using thermal shrink window insulation film. This somewhat mimics the effects of dual pane by providing insulation, reducing condensation, and still allowing you to see out.
Check Windows for Leaks
In addition to insulation, you should also check your windows for leaks. We know from experience that RV windows are NOT airtight. You can easily find gaps and fill them with bits of cloth or foam. The same goes for your slide-outs. Our bedroom slide has quarter-size gaps on each side, and we just shove one of Jeremy’s folded crew socks into each gap as part of our set-up process year-round.

Dehumidifier
Get a dehumidifier! A dehumidifier will do two things for you. First, it will keep the condensation on the windows and walls to a minimum. You’ll still get some condensation that should be wiped up every few days, but it’ll be way more manageable. Second, in cold environments, high humidity makes you feel even colder. We recommend a humidity level of 40-50% inside your rig all year round for maximum comfort.
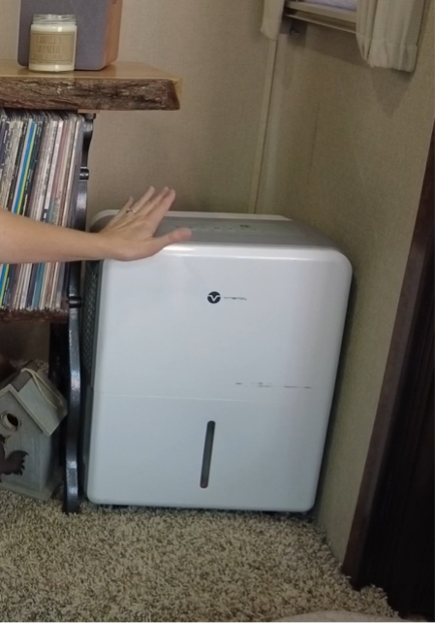
- Even with a dehumidifier, we recommend checking your slides daily where wall meets wall and wall meets ceiling for any moisture accumulation. RV slides have the least amount of insulation and don’t have furnace ducting running through them, so this is also an area you’re likely to see condensation.
- If your bed is in a slide and you have underbed storage, it’s highly recommended to either find a way to vent that area into your bedroom or use something like Damp Rid hanging bags or a Damp Rid Drop system.

Misc. Tips
BONUS TIP #1 - Another more in-depth thing you can do is to check/replace the insulation in your underbelly. This isn’t an easy task, and it’s way easier if you have two people, but it can be done. This requires removing the corrugated plastic sheeting that protects the underbelly to access the insulation. Again…not an easy task, but it’s a good idea to at least check this.

Things to look for are:
- Missing insulation. Make sure every square inch of underbelly is protected with insulation, especially around your tanks.
- Wet insulation, which reduces effectiveness AND promotes mold and mildew.
- Thickness of insulation. We recommend about 6 inches of thickness.
- R-Value. We recommend an R-Value of at least 19. The higher the R-Value, the better.
- Burned insulation. Burned insulation could be an indication of a potential electrical issue that needs to be addressed immediately.
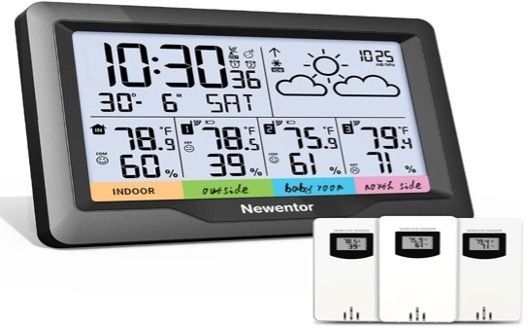
BONUS TIP #2 – Use temperature sensors to monitor the areas of most concern. Many portable weather stations come with multiple temperature sensors that can be displayed on a single screen. We use the Newentor Weather Station and have it mounted on the wall next to our thermostat where it’s easily viewable.
For more functionality, including remote monitoring and the ability to automate tasks, you can opt for a smart temperature monitoring system like the Govee temperature monitoring pack. We also use the Govee water sensors, so they’re already a trusted brand for us.
Conclusion
Living in an RV during the cold winter months can be a challenge, but it’s certainly manageable. The RV life, whether full time, part time, or as a weekend warrior, is something that should be enjoyed and there’s no reason to let bad or freezing weather ruin this experience. The recommendations we’ve made here are all relatively simple and will help you enjoy your RV all year long.
If you won't be living in your RV, check out our guide to Winterizing your RV
If you are hoping to migrate South for the winter, check out our Southern Migration Planning Guide.
Also tune into our RV Winterization Podcast for even more information!

