Vantrue X4 Dashcam Review
Doug S • April 16, 2025
From beautiful drives to crazy drivers, having a recording eye on the road makes perfect sense. My first thought of getting a dash camera came when we were driving up Pike’s Peak. The expansive views were stunning and the twisty drive was amazing. We stopped and took pictures, but I really would have loved to have a video to look back on.
Second to the stunning drives are the insane drivers out there. Back when I had a commute down I-95 in Maryland and around the DC beltway, I saw some crazy things- people reading newspapers, one guy playing trumpet, and a person with a parrot on their shoulder. RVs need more stopping distance and many 4-wheelers just don’t understand. Fortunately, we’ve never had any close calls but I like the idea of having a non-biased witness.
Disclaimer: I received a a Vantrue X4 dashcam in exchange for a review. As usual, I am expected to write a review but not necessarily a good one. I do my best to stay non-biased. So here goes…
First, a Video
Let’s start with a video that I put together of a local campground using the Vantrue X4 dash camera. I went there in the evening to dump tanks using my sewer bladder while moochdocking at my cousin’s house. I didn’t plan on taking a video when I left, so please ignore my dirty windshield.
But once I got over there, I thought a drive-around video at dusk would be a good example of the camera’s ability and would be useful for others to get a feel for Sharon Johnston Campground in Madison, AL.
Dashcam Selection
The features that I was looking for in a dash camera:
- High definition
- Low-light Performance
- Parking mode
- Crash detection
- Large SD card support
- Loop recording
High Definition
I’ve seen some recordings that look like they were recorded with a potato. I wanted the highest resolution I could find to record those beautiful drives or butt-head drivers!
The X4 supports up to 3840×2160 ultra-high definiton recordings. The problem here is the size of videos that it records. About every 3 minutes is 1gb. Multiply that out by your memory card size, and you can see that it doesn’t hold as much as you might like. I’ll talk more about how it manages the files on it.
Dropping the resolution can still give you a good picture at smaller file sizes. Play around with a few different sizes and see what works for you.
Low-light Performance
Surprisingly, I really don’t drive at night all that often, so getting a glimpse of the camera’s output has been difficult these past few weeks. I’ll come back and update that after a bit of testing.
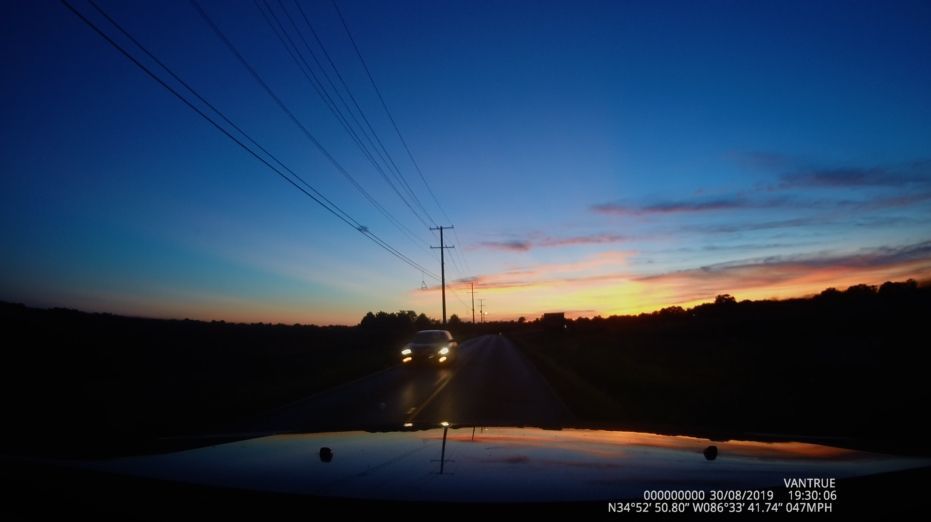
They boast “super night vision”, so we’ll see. I have high hopes given what I’ve seen so far. It seems to do a good job from the little bit that I’ve done. I even caught some really nice sunsets driving back from the campground the other night.
The camera did get confused driving straight west as it got darker all around but still had some bright light just before the sun fully set- but any camera would have a difficult time figuring out exposure for that.
Parking Mode
When you hard-wire the camera to be always on, the parking mode puts the camera to sleep after 5 minutes when the vehicle hasn’t moved. It wakes up up when a person or object passes by the vehicle, it wakes up and records. This is good so that you don’t end up with 8 hours of garage door recorded!
Crash Detection
When the camera detects a g-force impact, it automatically locks the video file from keeping it being overwritten later. This will make sure that the file is available later for review.
You can set different sensitivity levels. My wife proved that it worked by bumping the camera while putting up our thermal sunshade.
Large SD Card Support
With file sizes that quickly reach 1gb each, you want to make sure that you can store a significant amount of time on the card. The Vantrue X4 supports up to 256gb cards.
Loop Recording
When the dashcam records files, it does it in a few minutes at a time (configurable by you). When the memory card fills up (up to 256gb), it starts overwriting older files.
I figured out that at the highest resolution and my 256gb card, I will get about 12 1/2 hours of recordings on a memory card.
Installation
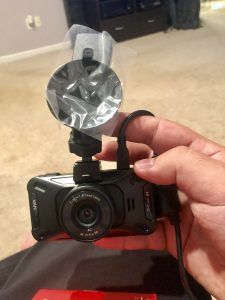
I assume installation of dash cameras are pretty consistent across brands, but I thought I’d touch on it here:
- Unpack dash camera and accessories from box
- Plug the camera into a USB charger and go through initial configuration (date/time, basically)
- Assemble the dashcam to the suction cup mount (if using the GPS module, use that instead)
- Use alcohol cleaner on the window where the suction cup will mount
- Press the suction cup against the window and rotate the locking mechanism
- Run the power cord (either hard-wired or not) and plug it into the camera; they suggest running the cord across the headliner so that there isn’t a cord hanging down in your line of sight
- Drive off into the sunset
- Optionally, check for updated firmware on the Vantrue website
GPS Support
There is a separate module that adds a GPS receiver. This records lat/long coordinates in the video files and using the data allows the vehicle speed to be calculated. There’s an option for including this on the recorded files.
I sort of wish this wasn’t a separate purchase as I think it’s a cool offering to be able to geotag the videos. The dashcam software I talk about below plots the videos out on a map, so you can see the exact route taken. (I’m especially excited about that for the rare cases that we do some off-road driving.)
Hardwiring
The camera comes with a long cord and a 12v plug on the end. And while I tried tucking the cord into the edge, it still is draped across the dash to get to the plug-in. And it looks TERRIBLE. I may try to tuck it in on the under-side of the dash and hide it away more.
But, what I really want is to hard-wire it using Vantrue’s kit.
Installing the hard-wire kit is pretty easy (so much so that it seems even I can do it!):
- Locate the fuse box on the vehicle
- Locate a fuse that is “always on” even when the vehicle is off (or not, if you don’t want the parking feature)
- Use the included “add a circuit” fuse holder to replace an existing fuse with essentially 2 circuits (the original and a separate fused connection for the dashcam)
Dashcam Viewer Software
I was a little surprised here, Vantrue didn’t really offer software or even guidance on viewing the video files. I did a few searches and came across the viewer put out by www.dashcamviewer.com. The software isn’t free, but it does a great job letting you navigate the individual video files. There’s a free but limited version that lets you decide if it’s right for you.
It’s pretty great. It shows the video files on a map and will even show the speed data from the video file. Plus, it lets you combine individual files into one long movie file for sharing.
Final Words
This dashcam isn’t cheap, but the quality is impeccable. Like I have stated, I have long wanted a dash cam for some of the beautiful drives that we do. We are fixing to head west and I absolutely wanted to be able to capture the road that lies ahead of us.
I’m looking forward to putting the camera through its paces with more nighttime driving and seeing how those videos turn out. But for now, I can definitely say I’m happy with what it offers.

